Well it's been a while hasen't it. Not much has changed.
Still racing, still doing craft shows.
I do have my own shop now. It's not quite ready to open yet. The inside is finished... it's the out side that need the work. Only waiting 3 years for that to get done. If hubby doesn't finish it this year... I may have to hire some one.
Sunday, September 4, 2016

Wednesday, November 13, 2013
Exciting things in the works!!
Well it's been a long time since I posted anything.
I'm still racing and I finished 6th in points for the 2013 season... not a bad finish.
I plan on racing again for another season.
 This was at Jefferson during the Tundra Series Race..it wasn't as much fun as I thought it was going to be. The car never had a good set up in it and no practice like some other race teams who had thousands of dollars and could go to these other tracks for weeks ahead, practicing till they were the best they could be,and took the fun out of it for those who didn't have rich daddies to pay for their racing...and could only go the day of the race.. Not knowing what set up should be in the car.
Not to mention the photo shoots these little girls showed off with at the tracks..and what for? only made other drivers disgusted with their money. Flaunting how rich they are. Jealous? hell ya.. I wish my Daddy was still alive and rich.. least my parents stayed together. And my Daddy built my first race car him self... MORE than what any little rich girl's daddy every did for them!
I'll stay at my home track next season and beat those spoiled little girls.. like I did this season..
ANYWAY.... racing isn't my only love... there's bowling..
This last weekend I was in a tournament with my team of 4 ladies.. as a team.. well maybe we should have stayed home this year Saturday..considering we won this same tournament as a team last year!!!!.. BUT Sunday... oh yea Sunday was a different story.
I got to partner up with my bowling idol.. A lady who I have admired for many years... and finally got to be her partner in the double part of the tournament.
I hoped I could do her justice. She is a much better bowler than I am.
I started out with a 220 game!!! I don't know where that came from but I was elated. Then I literally fell on my face.... I opened the first 4 frames and even to my horror threw a gutter ball..OMG!
I am so lucky my idol kept her cool and covered for me.... well she basically won it for us...
I am VERY proud to say we WON the doubles part of the Wisconsin Valley tournament!!
Well Carol won it for the two of us!!!
ON to more things that I love... PRIMITIVES.
I don't want to let the cat out of the bag just yet..... but HUGE things are in the works for Two Mile Creek Primitives.. Things I never thought possible.
I have tons of work ahead of me... and 8 months to get what I dreamed of all my life into reality. Yet here I sit in my night gown at 3:51 in the afternoon....sigh....
I'm still racing and I finished 6th in points for the 2013 season... not a bad finish.
I plan on racing again for another season.

Not to mention the photo shoots these little girls showed off with at the tracks..and what for? only made other drivers disgusted with their money. Flaunting how rich they are. Jealous? hell ya.. I wish my Daddy was still alive and rich.. least my parents stayed together. And my Daddy built my first race car him self... MORE than what any little rich girl's daddy every did for them!
I'll stay at my home track next season and beat those spoiled little girls.. like I did this season..
ANYWAY.... racing isn't my only love... there's bowling..
This last weekend I was in a tournament with my team of 4 ladies.. as a team.. well maybe we should have stayed home this year Saturday..considering we won this same tournament as a team last year!!!!.. BUT Sunday... oh yea Sunday was a different story.
I got to partner up with my bowling idol.. A lady who I have admired for many years... and finally got to be her partner in the double part of the tournament.
I hoped I could do her justice. She is a much better bowler than I am.
I started out with a 220 game!!! I don't know where that came from but I was elated. Then I literally fell on my face.... I opened the first 4 frames and even to my horror threw a gutter ball..OMG!
I am so lucky my idol kept her cool and covered for me.... well she basically won it for us...
I am VERY proud to say we WON the doubles part of the Wisconsin Valley tournament!!
Well Carol won it for the two of us!!!
ON to more things that I love... PRIMITIVES.
I don't want to let the cat out of the bag just yet..... but HUGE things are in the works for Two Mile Creek Primitives.. Things I never thought possible.
I have tons of work ahead of me... and 8 months to get what I dreamed of all my life into reality. Yet here I sit in my night gown at 3:51 in the afternoon....sigh....
Tuesday, April 12, 2011
LABELS LABELS LABELS
Well I am finally getting my labels listed .. You can trot on over to my FB page . I have sets 1,2,3 and 4 shown,, Set 5 is here FREE just scroll down and get them.. I'll have sets 6 and 7 listed on my FB page some time Wed. Here's where to go. After you are on Face Book search for Two Mile Creek Primitives.. and LIKE me! :) Pictures are in Photos.. Prices listed and you can message me there or leave a comment here..
Tuesday, March 22, 2011
Free Easter Labels
Don't forget to pop in and download your free Easter labels.
Happy Easter!!
http://www.box.net/shared/ybexqm9uk7
Happy Easter!!
http://www.box.net/shared/ybexqm9uk7
Wednesday, March 16, 2011
CHECK OUT THE ARTICLE ABOUT THE TATTERED ANGEL
http://www.ifallsjournal.com/news/business-news/little-country-katie-kolt-hall-staff-writer-103
MY BEST friend Deb Reller has a wonderful article in the International Falls Journal today.. Check it out.. and if you are in the area.. she is having a spring open house!!! TONS of wonderful new items for spring and EASTER!!!!
MY BEST friend Deb Reller has a wonderful article in the International Falls Journal today.. Check it out.. and if you are in the area.. she is having a spring open house!!! TONS of wonderful new items for spring and EASTER!!!!
Saturday, July 17, 2010
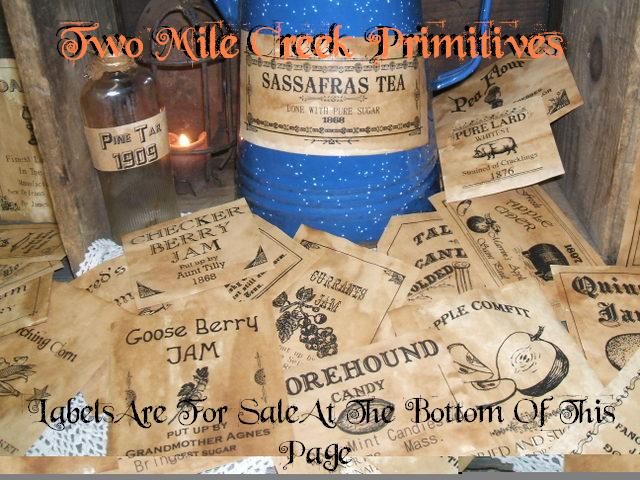
VINTAGE FARMHOUSE LABELS FOR SALE
BONUS LABELS in this set SET 7 EVERYDAY
 A FEW HEALTH LABELS

SOME CANNING LABELS
 VINTAGE LABELS
 SET 7 EVERYDAY
 A FEW HEALTH LABELS
SOME CANNING LABELS
 VINTAGE LABELS
SET 7


Check out the vintage farmhouse labels at the bottom of this page. I have sets 1 thru 7. Including 3 everyday pantry labels and 2 different sets of Halloween, 1 Christmas. Leave a comment and you email if you wish to see pictures the sets not listed here. Payments made thru Pay Pal. Join the fun of turning your kitchen back a few decades!!!!
Tuesday, June 8, 2010
100 lap FEATURE!!!!


WCS Memorial 100 (May 31st)
Chris Weinkauf served notice Memorial Day when he won the Wisconsin Challenge Series (WCS) 100 lap event by a big margin at Golden Sands Speedway. Chris posted fast time over a field of cars that included Steve Holzhausen and Jeremy Lepak, who raced closely for over 50 laps behind Weinkauf for 2nd and 3rd. Only 1 caution marred the race, when Eugene Gregorich and Jeff Weinfurter both spun early. Weinkauf started 11th and wasted no time getting to the front, taking the lead from our lady driver Rene' Scheinoha who lead the first 25 laps of the race. Holzhausen's usual steady march to the front brought Lepak with him, and the two looked to be the only others capable of matching Weinkauf's speed. The Checkered lap saw Weinkauf clearing lapped traffic, leading by about a dozen car lengths, Holzhausen and Lepak nose to tail. Bryan Reffner and new standout Skylar Holzhausen finished 4th and 5th. Scheinoha finished 7th.
Chris Weinkauf served notice Memorial Day when he won the Wisconsin Challenge Series (WCS) 100 lap event by a big margin at Golden Sands Speedway. Chris posted fast time over a field of cars that included Steve Holzhausen and Jeremy Lepak, who raced closely for over 50 laps behind Weinkauf for 2nd and 3rd. Only 1 caution marred the race, when Eugene Gregorich and Jeff Weinfurter both spun early. Weinkauf started 11th and wasted no time getting to the front, taking the lead from our lady driver Rene' Scheinoha who lead the first 25 laps of the race. Holzhausen's usual steady march to the front brought Lepak with him, and the two looked to be the only others capable of matching Weinkauf's speed. The Checkered lap saw Weinkauf clearing lapped traffic, leading by about a dozen car lengths, Holzhausen and Lepak nose to tail. Bryan Reffner and new standout Skylar Holzhausen finished 4th and 5th. Scheinoha finished 7th.
Friday, May 28, 2010
4 LEAF CLOVERS
 The 5 leaf clovers and a 6 leaf clover
 Here are the results of todays hunt!!!
 See the 4 leaf AND the five leaf clover in this picture??
 Beautiful!!!!!
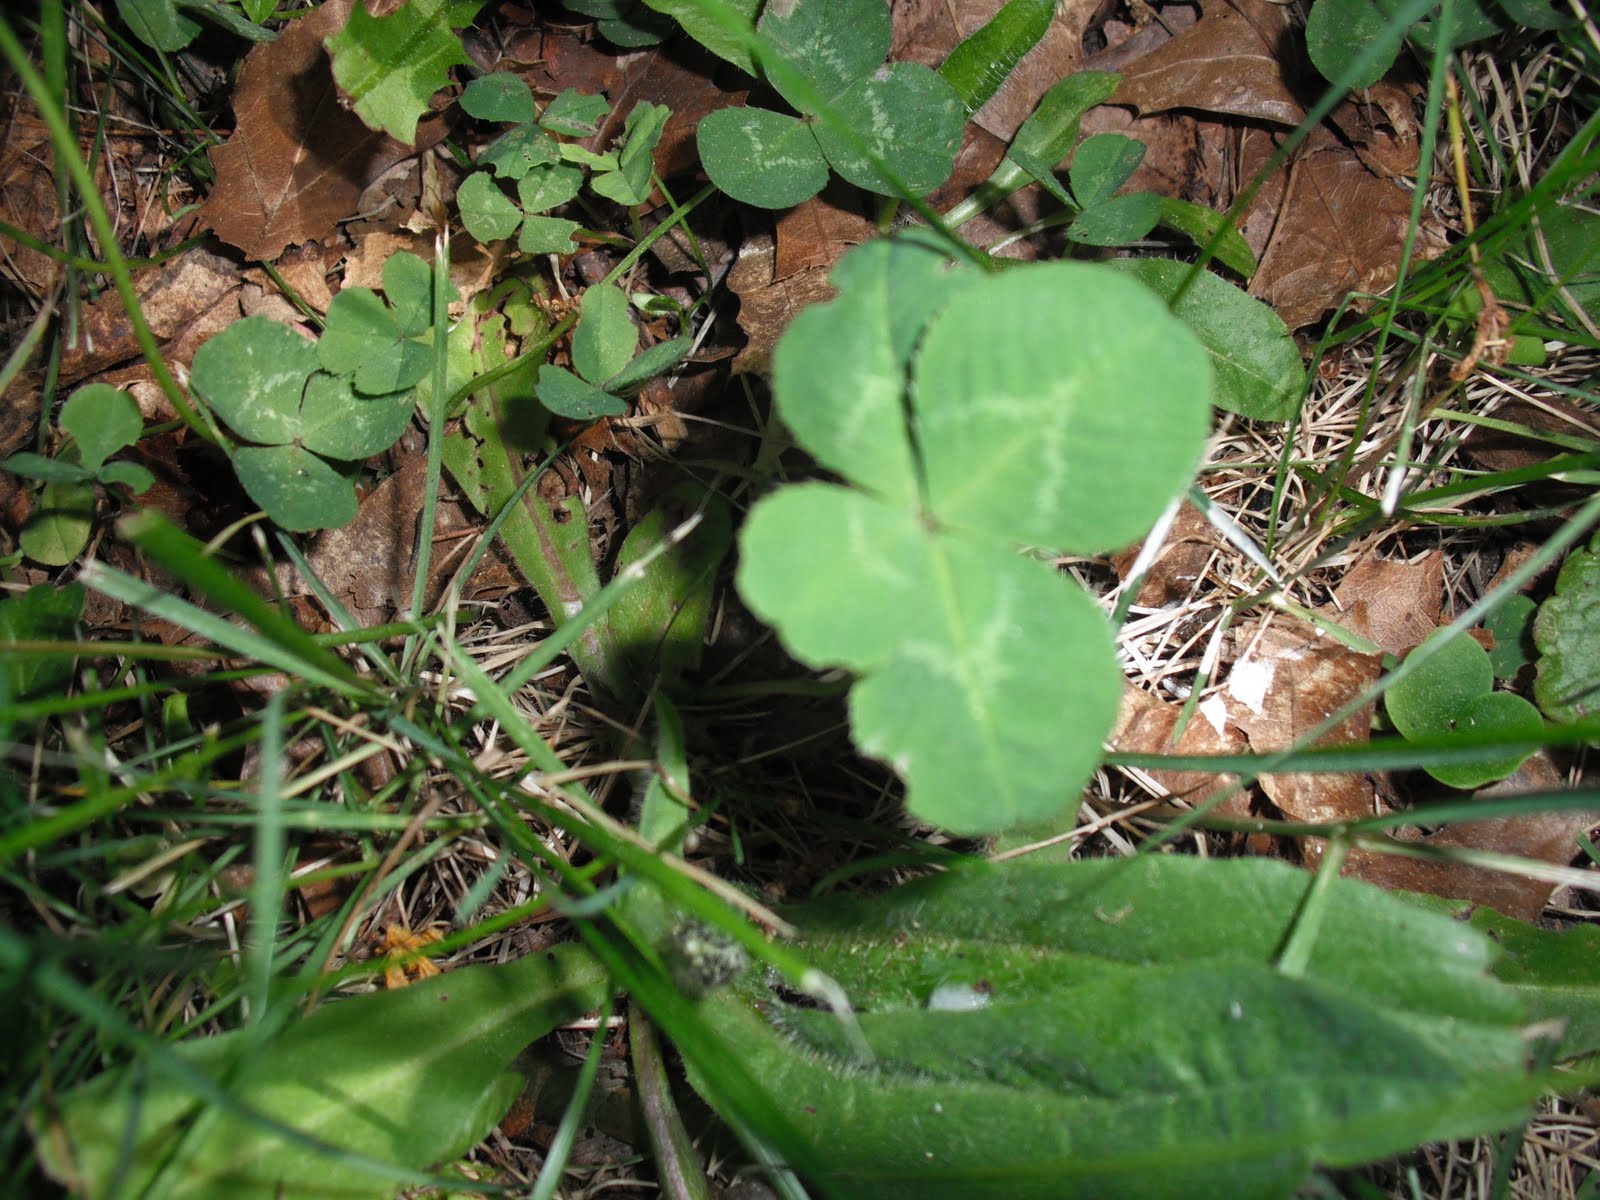 I love a good "Hunt"

OOPS this pic was posted twice!! OH well It's a beauty!!!
Ever take the time to look for a 4 leaf clover? Ever find any?? Think it's a waste of time? Maybe you think they don't exist... or do they? I can't walk past a patch of clover. I fall to the ground and start searching for them. My posture has caused people to call emergency people to come to my aid because they think I have taken ill and collapsed to the ground and need medical help.Imagine my surprise when I looked up from my "hunting" only to find not only an EMT but the ambulance behind me ready to scoop me up for a terrifying ride to the ER! That happened at the race track when I was pitting for my team mate last year. My EMT friend was very reluctant to leave my side as he dearly thought I needed medical attention and that I really wasn't wasting my time looking for the elusive 4 leaf clover! Little does he know I DO have a problem.. I can't pass a clover patch!!!! I NEED to fall to the ground and begin my search. Ever since I was a little kid I could find 4 leaf clovers like most people find the 3 leaf kind. 5, 6 ,7 and even 9 leaf clovers have not escaped my eyes. My hunt last week resulted in 81 clovers with 4 or more leaves.... HA!!! my friends say "Ya right.... 81" OK to day I took my camera with me and I took a few pictures as I "Hunted". 30 was the number of 4 leaf clovers I found today.... a few 5 leaves and 1 with 6 leaves... Sigh...... I must be slipping..only 30!
Monday, April 26, 2010


Monday, April 5, 2010
MOUSE GIVE AWAY

CHECK OUT THE CUTE MOUSE ELANOR ANDREWS FROM SHANTOCK IS GIVING AWAY
GO TO WWW.SHANTOCKBEARS.COM
GO TO HER BLOG AND CHECK OUT HOW TO WIN THIS WONDERFUL LITTLE MOUSE.
ALSO PICK UP THE LATEST ISSUE OF TBR (TEDDY BEAR REVIEW)
GO TO PAGE 44 AND READ ALL ABOUT THE 2010 COLLECTION!
Tuesday, February 16, 2010
Free Easter Labels
I just put the link to my free Easter labels up.
http://www.box.net/shared/ybexqm9uk7
http://www.box.net/shared/ybexqm9uk7
Sunday, September 20, 2009
MY HARVEST SWAP GOODIES!!!!! From Char's Blog Harvest Swap

WHOOO HOOOO I got my fall swap goodies and boy oh boy did I get the mother load!!!!!
Lookie lookie at all that I got!!!!!!
But ya want to know what is even better than all of this????
The wonderful friend I have found thru this swap!!!
My now new bestest buddy Deb, from http://www.crowsonthecupola.blogspot.com/
I have been running all over my house setting out my new fall decorations. The Pumpkin Pie on my oak table, The HANDSTITCHED pillows Deb made are in my cupboard, The little hand painted trinklet box fits nicely on one of my shelfs, the candy corn,,, I LOVE the candy corn she made for me, they are in my kitchen, The Harvest Pumpkin is greeting my guests in the entry way, And look at the sign!!! What a HOOT!
"May all your pumpkins be PLUMP"! OMG!! How cute is THAT???
I LOVE all of it. Thank-you so very much Deb for all my goodies. I love every item I got,,and the work... the detail that went in to these pieces..wonderful.. lordy the time in them. Deb's workmanship is perfect!!! I should say Spellfully Purrfect! LOL!! ( That's a special thank you Deb,,You KNOW what I mean...giggles!)
Your's is on it's way Monday. I'm late but I hope it will be worth it.
Thank-you Char for hosting this swap!!!!
Lookie lookie at all that I got!!!!!!
But ya want to know what is even better than all of this????
The wonderful friend I have found thru this swap!!!
My now new bestest buddy Deb, from http://www.crowsonthecupola.blogspot.com/
I have been running all over my house setting out my new fall decorations. The Pumpkin Pie on my oak table, The HANDSTITCHED pillows Deb made are in my cupboard, The little hand painted trinklet box fits nicely on one of my shelfs, the candy corn,,, I LOVE the candy corn she made for me, they are in my kitchen, The Harvest Pumpkin is greeting my guests in the entry way, And look at the sign!!! What a HOOT!
"May all your pumpkins be PLUMP"! OMG!! How cute is THAT???
I LOVE all of it. Thank-you so very much Deb for all my goodies. I love every item I got,,and the work... the detail that went in to these pieces..wonderful.. lordy the time in them. Deb's workmanship is perfect!!! I should say Spellfully Purrfect! LOL!! ( That's a special thank you Deb,,You KNOW what I mean...giggles!)
Your's is on it's way Monday. I'm late but I hope it will be worth it.
Thank-you Char for hosting this swap!!!!
Tuesday, June 23, 2009
Shelf Tutorial Using Wall Paper Border Part 2
Ok Here we go again.. You'll have to read part 1 so this makes sense to ya. We are making a shelf using wallpaper border. OK ready???? Lets finish the shelf so you can see what you are making!!
 Have the side boards even with the drawn line..remember the line is the traced line around your wall paper border..on the plywood. 3/4 of an inch away from the sides and the top. The bottm has a piece of trim even with the plywood edge. OK
 Please drill some pilot holes so you don't crack the wood..We got this far ,,we don't want to ruin it now.......
 Nail the sides to the trim piece.
 Now flip it over and nail the back.
Next get a piece of wood . I used a piece 5 3/5 inches wide and 6 inches longer than the length of my wall paper border. It is also 3/4 thick.

From the top..... set the piece of wood on the space you drew on top of the wall paper in the begining. I measured 3 inches for the over hang on the each end of the shelf.. You might want a longer shelf that is fine ..add the inches here.

Here I have my top piece ready to be nailed to the sides. I am making the 3 holes that I will drill pilot holes for so my top won't crack. I have a 3 inch over hang on each side of my top side of my shelf.. And if you want, you can add some hooks or knobs to your trim piece as I did.. I will removed them when I paint my shelf but for now I have the holes ready to put them back into place after I am done painting and finishing my shelf.
 MY 3 holes are drilled and I'm ready to put the nails in.
 Flip it over and put your nails in the back. I put 7 nails across the top.

From the top..... set the piece of wood on the space you drew on top of the wall paper in the begining. I measured 3 inches for the over hang on the each end of the shelf.. You might want a longer shelf that is fine ..add the inches here.
Here I have my top piece ready to be nailed to the sides. I am making the 3 holes that I will drill pilot holes for so my top won't crack. I have a 3 inch over hang on each side of my top side of my shelf.. And if you want, you can add some hooks or knobs to your trim piece as I did.. I will removed them when I paint my shelf but for now I have the holes ready to put them back into place after I am done painting and finishing my shelf.
MY 3 holes are drilled and I'm ready to put the nails in.Flip it over and put your nails in the back. I put 7 nails across the top.Here you can see the inside where the top meets the side in the corner...Nice clean edges for not many measurments Eh?
Here I am measuring for the knobs or hooks if you want some.. I put one in the middle then measured in 2 inches in from each side for the other 2 knobs. I drilled pilot holes and used black skrews to hold my knobs. I will remove them when I paint the shelf.
Wanna see what we have so far????????
 OK>>> Here the wallpaper it fits in and we are ready to paint the shelf.. I am doing my black.
 Paint the whole back black. Paint everything black on the front except all the middle where the wall paper will go. Plaint about a 1/2 inch edge on the plywood where the wallpaper will be glued..You are doing this in case when you trimmed the wall paper , if you took too much off , the black will make it not so noticable.
 And now we can sand our shelf..and stain it..sand it till the wood shows thru in places. When the black is dry, you can paint a second color like red or mustard and sand thru to the black in places and all the way thru to the wood also in places. I used minwax a dark walnut stain.. I rubbed it on with a rag and wiped it off. After it is dry..you can FINALLY glue your wall paper border in. I put white glue around the very edges where I painted the black in the plywood front.. Just so I was sure the wall paper didn't lift.. Other wise I just wet the back of the wall paper as I would if I were putting it on a real wall.
Just have to sand it and glue the wall paper in it and stain it........ YEA!!! WHOO HOO Here it is all finished.. This one I didn't not put knobs on it. It has the dark walnut stain finish..Now all ya have to do is put some hanging hooks on the back and figger out where you want to hang it in your home.... I made 3 shelfs during this tutorial..so that is why some had knobs and some didn't. I hope you were able to follow me here.. I wanted to show you that you can make a shelf using ANY size of wall paper border that you want. By starting with the wallpaper itself and going from there by drawing a line around it on plywood.. You can just built it right up from almost nothing.
Hugs Rene
Shelf Tutorial Using Wall Paper Borders Part 1
OK this is going to be a long drawn out tut but I think it will be easy. I have like 31 pictures to walk you thru this. SO Ever seen a piece of wall paper border you thought would make a really cool....SOMETHING?? But what??? Here is what you can do with it.....Find an old piece of plywood..or if your lucky enough to have a new piece use that. This is the back side that you never see.. It's normally nailed to the wall! Here is the front side of the plywood I am going to use...Nasty ain't it..ok..not for long!!
 Take your wall paper border and select the part you want to use.. Wall paper border repetes so look for a place to cut where you have the whole picture with out over lapping the picture on the ends. I got this at Menards and it cut real nice between the houses. Cept I think it's printed at an angle?? Whatever..OK get your piece of wall paper border cut..Size does not matter. Any size border will work for this project.
 Now lay the wallpaper down on the BACK side of the plywood DON'T GLUE IT!!! just set it down..... We will be using new boards for the frame so.... find a nice board.. I used a piece of trim I had laying around here.. it does not matter how wide it is only that it is exactly the same length as your wall paper picture. You can now measure the trim so it is the same length as the wall paper is long, mark a line and cut the trim. Lay the trim down EVEN with the bottom edge of the plywood, leaving a space on all 3 remaining sides. Lay the wall paper above it so it is touching the trim but not under it. Draw a line around the wall paper. Ok new boards are 3/4 of an inch thick sooo measure 3/4 of an inch from the wall paper line and trim draw a line 3/4 away up the sides and across the top.. Draw a 3/4 space.
Here is the front side of the plywood I am going to use...Nasty ain't it..ok..not for long!!Take your wall paper border and select the part you want to use.. Wall paper border repetes so look for a place to cut where you have the whole picture with out over lapping the picture on the ends. I got this at Menards and it cut real nice between the houses. Cept I think it's printed at an angle?? Whatever..OK get your piece of wall paper border cut..Size does not matter. Any size border will work for this project.Now lay the wallpaper down on the BACK side of the plywood DON'T GLUE IT!!! just set it down..... We will be using new boards for the frame so.... find a nice board.. I used a piece of trim I had laying around here.. it does not matter how wide it is only that it is exactly the same length as your wall paper picture. You can now measure the trim so it is the same length as the wall paper is long, mark a line and cut the trim. Lay the trim down EVEN with the bottom edge of the plywood, leaving a space on all 3 remaining sides. Lay the wall paper above it so it is touching the trim but not under it. Draw a line around the wall paper. Ok new boards are 3/4 of an inch thick sooo measure 3/4 of an inch from the wall paper line and trim draw a line 3/4 away up the sides and across the top.. Draw a 3/4 space.
See in the pictures a line drawn 3/4 of an inch all around the wall paper and the trim . You don't have to draw a line under the trim.. The trim IS the bottom.


oK go ahead and cut out the plywood piece. You should have now. A piece of plywood 3/4 of an inch bigger on the sides and the top than your wallpaper border and the width of your trim on the bottom.
 Bottom rim is even and 3/4 on the sides and top. You can sand the edges of the plywood to get rid of any splinters.
Put some white glue under the trim and press down.. Hold it and flip the plywood and trim over so the finished side is up.
 Put a few nails thru the finished side into the trim..Make sure the nails are shorter than the thickness of your trim so they don't go all the way thru the trim. Make sure the bottom edge stays even and the side and top still have a 3/4 space.
 Flip your plywood back over and it should look like this now.. The trim is glued and nailed. You are now ready for the sides of the shelf. Get your new wood. I used 2....3/4 x 3 1/2 x 15 inch long piece as that is what I had. You need 2 pieces. One for each side of the shelf.

OK Here I lined up the top of my new board EVEN with the top of the wall paper. The new board is laying on it's edge and on the 3/4 inch space you left on the sides and top.

oK go ahead and cut out the plywood piece. You should have now. A piece of plywood 3/4 of an inch bigger on the sides and the top than your wallpaper border and the width of your trim on the bottom.
Bottom rim is even and 3/4 on the sides and top. You can sand the edges of the plywood to get rid of any splinters.Put some white glue under the trim and press down.. Hold it and flip the plywood and trim over so the finished side is up.
Put a few nails thru the finished side into the trim..Make sure the nails are shorter than the thickness of your trim so they don't go all the way thru the trim. Make sure the bottom edge stays even and the side and top still have a 3/4 space.Flip your plywood back over and it should look like this now.. The trim is glued and nailed. You are now ready for the sides of the shelf. Get your new wood. I used 2....3/4 x 3 1/2 x 15 inch long piece as that is what I had. You need 2 pieces. One for each side of the shelf.OK Here I lined up the top of my new board EVEN with the top of the wall paper. The new board is laying on it's edge and on the 3/4 inch space you left on the sides and top.
Here you have to decide how much you want to hang down below your trim. I went about 3 inches...AND I want a curve not a blunt straight cut.... so ..............
Make a piece of paper the same size as your new wood..side.....

Make a piece of paper the same size as your new wood..side.....
And draw a curve that you like on the end..This will be your pattern for the bottom side of your shelf. Draw it on the wood and cut it out..Sand the edges smooth.

 Draw on the wood.
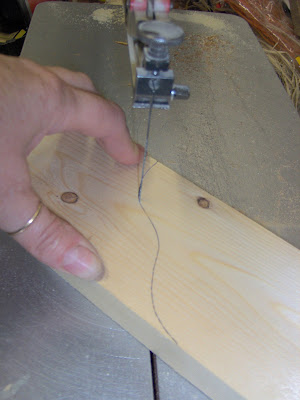 Cut it out on your scroll saw.
 Sand the sides and bang the edges on the end of the belt sander.. You can also sand it by hand..
Now make another one exactly the same for the other side of the shelf!
 Hand sand too if you don't have a belt sander.
 Now lay the sides on the plywood in the 3/4 spaces you left on the sides of the wall paper. Measure so the side board is EVEN.........
 with the top of the wallpaper NOT THE TOP OF THE PLYWOOD. You need a 3/4 space at the top.. Draw a straight line and cut the board. Now sand the edges at the top.. And get your glue ready.
 Put some glue on the ends of the trim.
 Put the side piece on the plywood on the 3/4 space you left on the sides of the wall paper. And even with the top of the wallpaper. I'm gonna post this so I don't loose it and finish the shelf in part 2.
Subscribe to:
Posts (Atom)


